

Blog

Make Food Fun for Kids and Kids at Heart!
Whether you admit it or not, kids aren’t the only ones who want to play with their food. Exciting and fun delicious food should be embraced by adults too!
Thanks to social media, you’ve probably seen some interesting ways to have fun and try new things when preparing, serving, or eating food. Check out these kitchen tools you’d love!
Delicious Crepes
If you’ve ever eaten a delicious french crepe before, you know how delectable it is! They can be made sweet or savory to satisfy any craving you might have. You might think that the only way to get the perfect crepe is at a fancy dinner, but we have good news for you. You can make your own tasty crepes at the comfort of your home. All you need are the ingredients and a great crepe maker like StarBlue’s Crepe Maker!

Fun Bubble Waffles
Bubble Waffles are a street food that hails from Hong Kong and is known as gai daan zai, or “little eggs” in Cantonese. This street food has become an Insta superstar which has turned it into the must-have breakfast or snack of the moment. Make your own infinitely instagram worthy bubble waffle ice cream cones/egg waffle cones right at home!

Savory Churros
Churros are a delicious fried dough treat, served warm and dusted in sugar and cinnamon with a pot of melted chocolate on the side. They are a staple pud at some of our favourite Spanish and Mexican restaurants. But now you can whip them up in your own home. Want to eat churros every morning but don't want to deal with daily deep frying? Click here!

Delightful Bowl Waffle
The waffle cone has delighted generations of ice cream lovers for over a century. Now there's a new twist to that classic treat, the waffle bowl! Delicious waffle bowls are the perfect addition to an ice cream. They're cheaper, better tasting, and super easy to make at home.


Ways to Keep Homemade Tortillas Fresh
Griddle
Open flame
Keeping your homemade tortillas soft after reheating
Once the homemade tortillas are heated, you would want to keep them warm for much longer. So wrap them in a damp towel and transfer them to a tortilla warmer to keep them nice and hot. StarBlue's special Ceramic Tortilla Warmer has over one-hour heat retention, thanks to its double-wall structure and quality food-grade ceramic material! It also comes with a lid! Plus, it's mircrowave safe!

Great Ideas for Brunch
Did someone say BRUNCH?! Perhaps you're a mid-morning person--always waking up on an hour that's too late for breakfast and too early for lunch. Maybe you're inviting some people over for a productive, head start meeting. Or better yet, you just want to make your lazy weekends extra special!
Whatever your reason is for a good brunch, we have some delicious ideas that will definitely get you loaded for the day!
Brunch Crepe Pockets

These crepe pockets are a combination of your favorite light and easy crepes loaded with heavy, savory fillings that will put you in a great mood throughout the day.
Get it started by mixing flour, eggs, a portion of milk, and salt, until smooth. Add in the remaining milk and mix again until the batter is thin and smooth, then set aside. Meanwhile, add butter and onions to a pan then cook until browned. Add garlic, spinach, and salt, and stir until spinach is wilted.
Pour the prepared batter on a crepe maker, spreading it around the pan until it's thin. Using a spatula flip the crepe over and cook through for about 2 minutes. Repeat this step with the remaining batter.
Next, preheat oven to 350 degrees. Lay the crepes on a baking sheet. Place one slice of cheese in the middle of a crepe, then top the cheese with 2 slices of ham and the spinach mixture. Top with a fried egg and fold the edges over the egg, pressing down to make sure the sides stay in place. Repeat with the other crepe. Bake the crepes for 5 minutes or until the yolk is at the desired consistency.
Coffee-Flavored Waffle Bowls

What's a brunch without coffee? For a slow morning, it's important to get your dose of much-needed caffeine. But instead of a simple drink, why not have it on your waffles?
To make Coffee Waffle Bowls, get started by whisking flour, granulated sugar, brown sugar, baking powder, salt, and baking soda. Whisk eggs and ricotta in a large bowl just to incorporate, then add buttermilk and espresso powder; whisk until smooth. Whisk in melted butter, then fold in dry ingredients, being careful not to overmix. Let batter sit uncovered at room temperature 30 minutes to allow the flour to hydrate.
Pour a portion of the batter onto a waffle bowl maker for 5-7 minutes or until it's golden brown and cooked through. Repeat with the remaining batter, brushing the iron plates of the waffle bowl maker as needed. For the waffle bowl filling, add in fruits, cream, maple syrup, or whatever else you desire. Crazier idea: Add actual coffee to your bowls!
Bubble Waffle and Chicken Salad With Maple Dijon Vinaigrette

Looking for a brunch meal that's loaded with all the Southern flavor fanfare...but with a healthier spin? Incorporate your healthy salads with fun bubble waffle croutons!
To make the round waffle croutons, first, start with your go-to batter. Pour it on an egg waffle maker and cook until ready. Cut up the spheres formed on the bubble waffle and spread them onto a baking sheet. Drizzle with melted butter, then bake at 350 degrees for 7-10 minutes.
Meanwhile for the vinaigrette, mix oil, dijon mustard, maple syrup, vinegar, salt and pepper, until they're all evenly incorporated. Assemble the salad on a bowl or platter. Make a bed of greens, then add tender chicken pieces and round waffle croutons. Finally, drizzle with the vinaigrette.
Recreate all these delicious recipes for your next brunch affair! Share your experience in the comments below!

Super Quick & Easy Keto Chaffles


Adding chocolate chips to your Chaffles is perhaps the simplest twist but finding those little bits of chocolate hiding all over the chaffle...what a delightful experience that is! Yes, a strict diet doesn't mean you have to say goodbye to those magical chocolate chips that remind you of childhood.


Best Pies to Serve this Holiday Season
No matter the holiday gathering, a beautiful and tasty pie is always a special gift to satisfy that sweet tooth. Trust us, these pie recipes are bound to be the star of the event.
Just make sure to save a slice for Santa (so that, you know, you can get what you want this Christmas!).
White Christmas Pie

Cue music: I've been dreaming of a White Christmas.......Well, even if there's no snow in sight wherever you are at the moment, you can experience Winter Wonderland in a bite. This baked pie crust is filled with a creamy and sweet coconut filling, flavored with both almond and vanilla extract.
To make the crust, cut the butter into pats and place flat on a plate, then put on the freezer until firm. Use a food processor to combine flour, salt and sugar, then add cold shortening. Add the frozen butter and pulse until the butter is pea-size. Pulse while adding cold water until you see the dough coming together. Pour the dough onto a floured counter and press together into a disc. Wrap tightly with plastic wrap and refrigerate.
After 30 minutes, remove the dough and on a floured surface, roll it out larger than your standard 10” pie plate. Place the dough over the pie plate and gently press in and up and over the edges. Next, place it on the freezer for 30 minutes just so it won't collapse while baking. Preheat oven to 375 degrees. Place the prepared dough in the oven for 20 minutes. After that, puncture the bottom of the crust to release steam and place it back in the oven for 15 more minutes. Cool to room temperature.
While baking, you can work on the filling. You will need to prepare the usual gelatin mixture mixed with granulated flour and salt. Add in milk then over medium heat, bring to a boil everything. Meanwhile, beat 1/2 cup of heavy cream to soft peaks and set aside. Then beat egg whites with cream of tartar and granulated sugar to stiff peaks.
In a large bowl, place cooled whipped filling and gently fold in whipped cream, beaten egg whites plus shredded coconut. Scrape the mixture evenly into the baked pie crust. Again, whip another two cups of heavy cream to stiff peaks and using a large pastry bag with a large star tip, make a decorative top over the filling and then sprinkle some coconut over the top. An optional step is to add strawberries and dusted with confectioners' sugar.
Mint Brownie Pie

Mint has always been representative of Christmas and as a homage of some sort to this flavor, we're gonna talk about this delicious Mint Brownie Pie. Now, before you raise your eyebrows--you could be among the crowd of mint-and-chocolate-combo non-fans--we're still hoping that perhaps this recipe will change your mind.
First, the brownie crust. In a large saucepan over low heat, melt butter and chocolate. Stir in sugar until smooth, then add eggs and vanilla. Stir in flour until well blended. Pour the batter into a greased springform pan. Next, bake for 18 to 20 minutes or until a toothpick inserted in the center comes out clean. Set aside to cool.
Meanwhile, for the filling, beat cream cheese and sugar until smooth. Beat in mint extract and, if desired, a little bit of green food coloring. Fold in your choice of frozen whipped topping, then spread evenly over the brownie crust. To set the filling, refrigerate the pie for at least an hour and it's good to go.
For garnish, you can melt chocolate chips and drizzle it over the top.
Spiced Cherry Pie
 Bring your all-time favorite cherry pie into the holidays. Amp up the celebration factor of this delightful treat by adding a tasty boost of cinnamon and allspice on the filling.
First things first, pit those delicious cherries using a reliable cherry pitter. Pitting is always an issue when making a cherry pie and since we're still at the first step, it would be great if the tool doesn't already give you a headache. Good thing StarBlue has a fantastic Cherry Pitter that does the job well (winks!).
Now, onto the filling. In a medium saucepan, combine granulated sugar, cornstarch, cinnamon, salt, and allspice. Add cherry juice and butter. Cook and stir over medium heat until thickened and bubbly. Then, remove from heat and stir in the cherries you pitted.
For the crust, we're going to make things easier by using a rolled refrigerated unbaked piecrust. Let it stand at room temperature according to package directions. Unroll it into a 9-inch pie plate, being careful not to stretch or prick. Cut the remaining piecrust in 1/2-inch wide strips.
Pour the filling you prepared into the pastry. Weave the strips over the filling, creating a lattice pattern, then press the strip ends into bottom pastry rim. Bake the pie in a 375 degree F oven for 30 minutes. Check it then put it back on the oven for 30 to 35 minutes more or until the filling is bubbly in the center and the crust is golden. To serve, sprinkle with some coarse sugar.
What are your favorite pie recipes that are truly representative of the Holiday season? Share them at the comments!

Amazing Japanese Street Foods You Must Try!
It is said that Japan has more Michelin star restaurants than anywhere in the world. That's why a trip to this culinary-rich country is never complete without a visit to any of the most renowned restaurants. But you may be surprised to know that some of the most delicious and innovative foods are found in more humble surroundings: street vendors.
These are some of the must-try options among the abundance of stalls you'll encounter in the unforgettable streets of Japan!
Yakisoba

While Yakisoba is commonly served in Japan-inspired restaurants we're all familiar with, in its country of origin, it is often found in the streets. Relatively easy to make, this is a standard food item of the Japanese, highlighting deeply savory flavors that are widely appealing. Wheat noodles, pork, cabbage, and onions are fried on a griddle, then topped with benishoga, katsuobushi, aonori, a squeeze of Worcestershire sauce, Japanese mayonnaise, and occasionally, a fried egg.
Okonomiyaki

Ever heard of the Japanese pizza? Apparently, many refer to Okonomiyaki as such because it is prepared the same way as pizza. It has a firm base--usually made of flour, eggs and cabbage, then baked on a grill--which is stacked with all types of vegetables and meats on top. Traditionally they might include a combination of prawns, octopus, squid, chicken, pork, noodles or cheese.
Dango

Dango are sort of like mochi--they are made with rice flour and shaped in balls. Only, they are impaled on a skewer. Usually, these treats are coated with a syrup made from soy sauce, sugar, and mirin and then grilled before eaten. Some vendors add variety like having matcha (powdered green tea) mixed with the flour, others use potato flour instead of rice. Some even coat or fill the glutinous balls with red bean paste.
Yakitori

Yakitori is grilled chicken on a skewer and also refers to skewered food in general which can be eaten simply with salt or with a kind of soy sauce. It's commonly made with bite-sized pieces of meat and vegetables grilled over binchōtan charcoal. Normally, when eaten in izakaya restaurants (Japanese tapas), they're great with a few beers. But on the streets, you can order one or two then move on to other stands serving other tasty food!
Taiyaki

Childhood memories in Japan are likely to include moments of indulging in Taiyaki, which are fish-shaped cookies or pancakes. Traditionally, these are filled with red bean paste, but in recent times, vendors have begun to experiment with other fillings like custard, chocolate, berries or matcha, appealing to the evolving taste of the younger crowd.
Agemanju

Crunchy on the outside and creamy on the inside, Agemanju is another sweet street food you shouldn't miss. While Manju has always been a popular Japanese confection, Agemanju is a deep-fried version that's getting all rave reviews in recent years. There are many varieties of agemanju, but most have the outer layer made from flour, rice powder and buckwheat and a filling of anko (red bean paste) that is made from boiled azuki beans and sugar.
Takoyaki

Arguably one of the most celebrated street foods in Japan, Takoyaki is a treat you won't help but fall in love with. Filled with diced octopus (tako), tempura pieces (tenkasu), pickled red ginger (beni shoga) and green onion, Takoyaki balls are cooked in special molded pans and are usually served in packs of 6-10. These are served with mayonnaise, Worcestershire-style sauce, plus a sprinkle of green laver and dried bonito flakes on top.
Recreate your own Japanese street foods at home!

It's always great to try the original, but if heading to Japan isn't one of the priorities at the moment, don't fret. You can still have these scrumptious street foods right at the comforts of your home! We suggest you try these amazing recipes from our friends at Just One Cookbook or you can also check out this link. Some recipes may seem tricky to do by yourself, but with handy tools like this amazing Takoyaki Maker from StarBlue, you'll find yourself cooking like a pro in no time!


Tips for Hosting a Wine & Cheese Party


Fresh fruit selections also enhance a wine-and-cheese spread. Go for classic favorites like grapes, cherries and berries. You can also pick melons, figs, peaches, apples, and pears for more variety, but just make sure to avoid overly acidic fruits such as pineapple.
To complete your festive platter, you can offer a selection of cured meats. As with everything else, don't go overboard in your selections; stick to two to four meats like thinly sliced prosciutto and slices or chunks of salami.


- When should I take out the cheeses?
- Should my wine be chilled?
- How many knives should I prepare?
- How do I serve the cheeses?
- Proper way to serve wine?

How To Make The Holidays More Festive


Unique Holiday Gifts

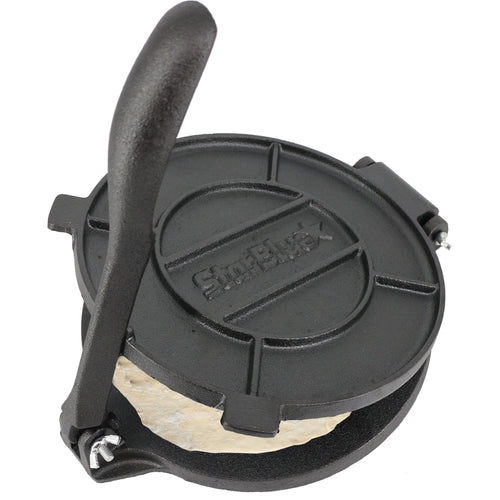
Make someone's weekly tradition--say, Taco Tuesday--even more impressive. This Cast Iron Press is every tortilla lover's must-have for their staggering collection of all things tortilla (or taco, enchilada, tostada, quesadilla, burritto...you name it). At 10 inches and 12.54 pounds of cast iron, this one's definitely made for no-nonsense, heavy-duty cooking. The larger, and heavier, size means that it easily churns out typical 6" tortillas that are nice and uniform. It's pre-seasoned with high-grade 100% Non-GMO flaxseed oil so that it can be used right away. It even comes with 100 pieces of oil paper to ensure that it doesn't stick! And because it is almost maintenance-free, cleaning it simply requires a simple wipe on the surface.


4 Good Reasons to Buy a Food Chopper
4 Good Reasons to Buy a Food Chopper
Whether you have a well-equipped kitchen or you are just starting with a small kitchen, some appliances come in handy anytime and a food chopper is one of them. If you are wondering what you can do with a food chopper and why it should have a place in your kitchen, here are some good reasons.
1. You can Make Spice Rubs for Meat
If you are a barbecue fan and love to throw barbecue parties in your yard, you’d love to put maximum flavor into your dishes. As an experienced cook, you know that here’s where you can use the magic of marinating. You can make your steaks more flavorful and juicier by rubbing spices like paprika and chili over them, while lamb and chicken go well with cumin and mustard. Here a food chopper helps you to achieve the perfect balance of flavors, whether you want to pound garlic, chop herbs or blend spices.
You can add any spices to your food chopper and make a fine powder. Rub it over the meat, cover with a cling film and refrigerate overnight.

2. You can Chop Onions (Without Shedding Tears)
If you love onions, an electric or manual food chopper is a great aid for you to chop them to add to various dishes including sandwiches, burgers, and more. Whether you want them finely chopped and are going to cook them for your chicken soup or dice them to eat them fresh to your sandwich. The food chopper does the job easily as its blades rotate at high RPM and you can prepare the dishes so quickly.

3. Make Salad Dressings, Dips and Salsas
Side dishes are equally important as the main dishes. They can add an extra tang to a bland main dish to make it interesting. But while making sides like salsas, sauces and dips, a lot of complex chopping is involved. But a food chopper can make your job easy.

4. Easy to Clean and Fits in Your Kitchen Easily
You’ll agree that your food processor takes a significant space on your worktop or in your cabinet. But looking at a food chopper on your worktop is easy on eyes. Being compact in size, it can be left on the platform or tucked away out of sight, anytime. Plus, it’s extremely easy to disassemble, clean and assemble again and operate, because it doesn’t have too many parts and don’t come with so many instructions, so, causes less confusion.
So, have you now made up your mind to bring home a food chopper?

Top 3 Types of Tortilla Press You’d Like to Choose From
A tortilla press, also known as a “tortilladora” in Mexico, is a metal or wooden tool used to make corn tortillas. Its parts are a base, top and a handle. Tortillas are made in tortilla press by placing balls of masa (dough) at the center of the press and then applying pressure with which the ball is flattened into a flat round tortilla. Only corn tortillas are made with tortilla press, whereas flour tortillas are made usually with wooden rolling pin.

1. Cast Iron Tortilla Press
As recommended by star chef, Rick Bayless, a cast iron tortilla press is the best for making fresh tortillas. The basic advantage of a cast iron press is its leverage and weight due to which your pressing job becomes a bit easier. If you need to make several tortillas frequently, a cast iron tortilla press is ideal. But remember that due to its weight, it may be difficult to lift it and move it around.
A tortilla press typically ranges in sizes from 6” to 8”.
Choosing the Right Finish
Silver Coating
A typical Mexican tortilla press has a silver coating which is usually applied “crudely”. Its purpose is to prevent rusting of the cast iron. This coating gives a rustic Mexican feel and is fun. It also tends to be less costly.
Powder Coating
This is actually an electrostatic applied finish. It is smoother to touch but more important than that is that it doesn’t flake like silver coating.
Unfinished
Uncoated tortilla presses have now been offered by some manufacturers. They have a light seal coat but no painted surface. This is good when you don’t wish to have painted coating. These presses should never be soaked in water and should be always dried well before storing. Otherwise they will rust.

2. Cast Aluminum Tortilla Press
If you find cast iron press heavier to lift and move around, an alternative is an aluminum tortilla press. However, remember that you’ll have to press much harder. Also, too much pressure may break the press soon.

3. Wooden Tortilla Press
A wooden tortilla press has in general a larger footprint than cast iron presses. They are commonly used in Mexico to make tortillas and empanadas. A wooden press made from solid blocks of hard mesquite wood is durable while those made with the soft pine wood are not.
A shortfall of wooden press is that they are more crudely made. Also their hinges and bolts are made of steel and are prone to rust. Also, as said earlier, this type of press is quite bulky and occupies a lot of space.
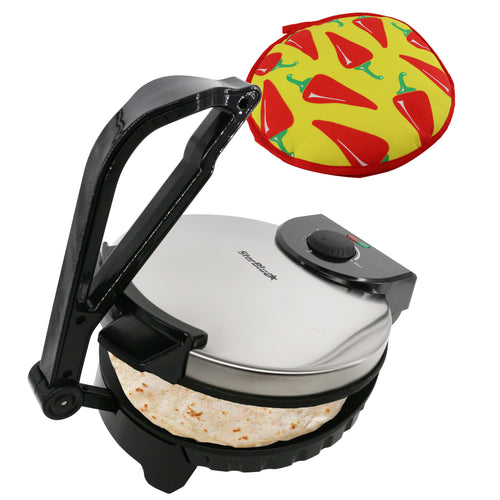
Electric tortilla presses are also available which bake the tortillas too, though you have to press them.
So, which tortilla press are you going to choose?
I gifted the Cheese Board Set to my sister for her housewarming, and she hasn’t stopped using it. The oak wood feels premium, and the utensils cut cheese smoothly. Guests always compliment how elegant it looks.

The Cast Iron Tortilla Press makes preparing tortillas effortless. Its heavy weight does all the work for me—no need to struggle with rolling pins. Every tortilla comes out perfectly round with minimal effort.

I bought the StarBlue Hamburger Grill Maker for weekend cookouts, and it’s now my go-to. Beyond burgers, we use it for eggs, bacon, toast, and even veggies—so versatile that breakfast is quicker and tastier than ever.

The Roti Maker has cut my cooking time in half. Instead of rolling and cooking one by one, I can prepare multiple in minutes. It’s a real time-saver, especially for busy family dinners.

The Takoyaki Maker is amazing. I used to only enjoy takoyaki at restaurants, but now I can make 18 at a time at home. The included picks made flipping easy, and the flavor turned out authentic.

Your StarBlue Questions, Answered.
From cooking tips to product care, find quick solutions right here.
Money Back Gurantee and Replacement?
Our money-back guarantee is automatically extended to 4 months when buying on our Official website. Other official selling platforms (e.g. Amazon) have 2 months where possiblility to extended to 4 months by Registration.
Which countries does StarBlue deliver to, and how fast is the shipping?
StarBlue products are currently delivered within the United States only through our partnership with the Amazon Fulfillment Network. This ensures reliable delivery within 2–5 business days to all US addresses.
For customers outside the US, you can conveniently purchase StarBlue products through Amazon’s international stores:
🇨🇦 Amazon Canada
🇬🇧 Amazon UK
🇩🇪 Amazon Germany
🇫🇷 Amazon France
🇮🇹 Amazon Italy
🇪🇸 Amazon Spain
🇦🇺 Amazon Australia
Where to find the recipe Ebook?
Electronic Book is available by scanning QR code on box or user manual of your item.
If you cannot find it, simple submit the request here or email us cs@starblue.co
What if the item is damaged due to delivery?
We're always here to help! Feel free to contact us by here or email us at cs@starblue.co anytime.
How to make perfect rotis using StarBlue Roti Maker?
We made an easy video for an easy follow through steps.