

Blog

5 Amazing Tips for Making Healthy Churros
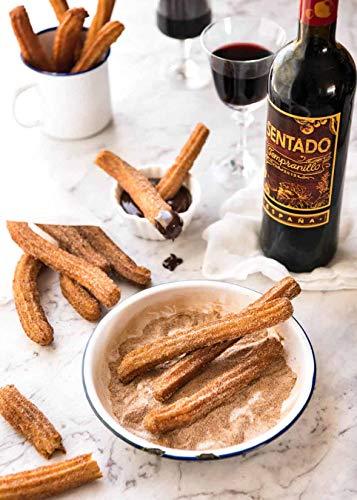
If you hear someone saying that she can make healthy churros, you may laugh. You may not believe that churros can be healthy. These tasty goodies are deep fried in the first place and then are rolled in or dusted with powdered sugar. So, you may think how they can be healthy. But if you want, you can make healthy churros. Here are a few tips.
1. Use Electric Churro Maker
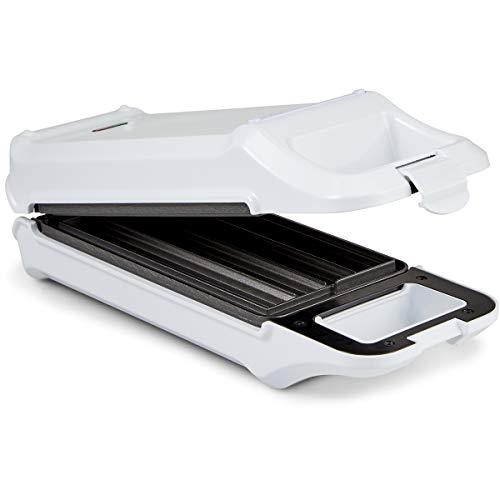
The StarBlue electric churro maker allows you to make your churros healthy by offering a no-fry cooking option. This churro maker has non-stick heating plates with churro molds on which you just have to place your churro dough and press and shut the lid (the handle is non-heating) and switch the churro maker on. The churros are cooked on electrically heated plates, just as or rather more crispy and tasty, as you fry them in oil, but without the additional calories. Thus, you get oil-free healthier, tastier and crispier churros.
2. Use Whole Grain or Oat Flour
While making dough for churros, you can avoid using the refined flour which offers you empty calories and gluten. Instead consider using whole grain or oat flour which is gluten-free. Whole grains and oats are considered to be the healthiest carbohydrates because they are full of fiber and have the lowest glycemic index. Thus they prevent sudden rise in your blood sugar and improves your digestion.

3. Healthy Sweeteners
Instead of rolling churros in refined sugar, you can use a natural sweetener such as stevia. Since the substitute may be different in consistency, you may need to make appropriate changes to the batter.

4. Make Use of Other Flavorings
If you have to use sugar, keep its quantity less and instead use other flavorings like cinnamon and/or vanilla extract in more amount. Both these are healthy and add a great flavor to the churros so that one needs less sugar. They also have an innate sweetness which also helps you to cut down on the sugar.
5. Replace Butter with Organic Shortenings
You can make your churros further healthier by replacing butter with organic shortenings while making your dough. Organic shortenings have no hydrogenated fats or trans fats. And they make your churros equally crispy and tasty as you make them with butter.
So, you can see that using the healthiest options for cooking, you can make churros not only healthy but also crispy and tasty.
The StarBlue Electric Churro Maker helps you in making healthy churros. You don’t have to use oil while churros in it due to which you can avoid those extra empty calories.
This churro maker is easy to clean because with just a few washes and wipes, it becomes spotlessly clean; so you never have to worry about hygiene.
Further this churro maker is very easy to use and so, your cooking time becomes fun. With just a push of a button, your churros are ready, so, you are free from that smoke, heat and sweat.
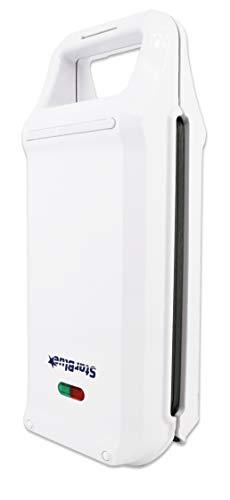
It has got a heat suppressing handle which protects you from burns and you never have to wait for shutting or opening the churro maker for the handle to cool down, or don’t have to use a kitchen towel to hold the handle which may get caught between the plates and cause a mess.
Due to its compact size, this churro maker can also be stored easily away and take out anytime to make churros without any fuss. There is nothing to assemble, adjust or fit – such an easy and fun experience!
What’s more, you also get a free recipe e-booklet; so, you don’t have to limit yourself with churros with this multifunctional appliance. There are so many recipes in the booklet like waffles, cookies and empanada!
So, have started planning a party with healthy churros?

6 Important Factors to Look for while Buying a Roti Maker
While rotis are a staple food in most of the Indian households, it’s not very easy for everyone to make tasty, light, round, white and perfectly soft rotis. Therefore, roti makers have been invented. Roti makers can not only make perfect rotis but they also save a lot of time of a housewife because she can perform her other duties and tasks while the roti maker is making rotis for her, whereas while making rotis manually, she has to be continuously engaged in the process and cannot do any other job. But roti makers aren’t totally flawless. With so many of them in the market, how can you choose a perfect roti maker?
The best thing about an electric roti maker is that it automates the process. But in addition, it can also have many features and functions that can make it still more attractive. Look at what functions it has.

1. Material and Size of Griddle (Tawa)
The tawa (griddle) of the roti maker should be made of a nonstick material so that you can avoid using oil. This is because the atta (dough of wheat flour) can otherwise get stuck to the tawa and the roti may end up as broken. Regarding the size of the tawa, there are various sizes available; however, for the best rotis 8”-10” tawa is ideal.
2. Indicator Light
This is an important feature and you should make sure that the appliance you are considering has it. An indicator light shows if the roti is ready or not and removes any guesswork and a possibility of your roti remaining over- or under-cooked. Because of the indicator light, one can also know that the appliance is on and accidents can be avoided.

3. Shockproof Housing and Non-heating Handle
It’s also important to check whether the body of the roti-maker is shockproof and is corrosion-resistant. This can save you from sudden breakage of the appliance and you get assurance of hygiene. Also check if the handle is non-heating so that you are protected from burns.
4. Return or Replacement Policy
Make sure you check the return or replacement policy before purchasing so that you can return the appliance immediately if you are not satisfied with the purchase and won’t have to repent.
5. Add-ons
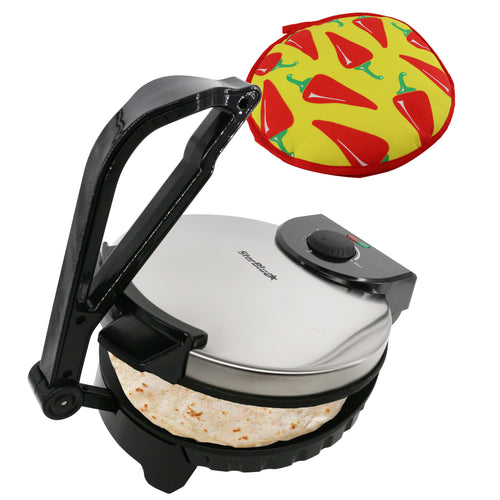
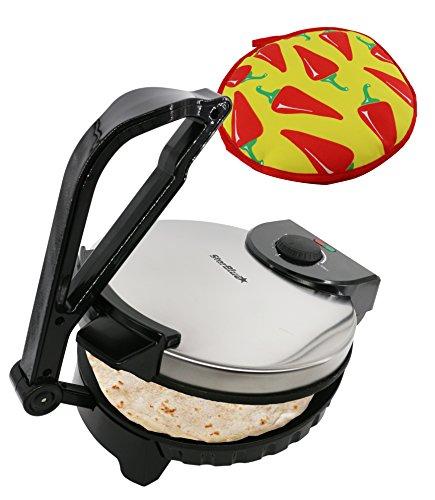
Check if the company is offering any additional goodies. E.g. with the Electric Roti Maker by StarBlue, you get a free Roti Warmer which keeps the rotis warm for up to an hour.
6. Performance
Checking the performance of the roti-maker you are planning to buy is important. Read reviews and see if other buyers are happy with the appliance, if the rotis it makes are soft and tasty, and if the overall performance is good.
The general method of making rotis in the roti-maker is like this:
You should make dough and keep it aside. Then plug in the appliance and wait for the indicator light to turn off or changes color as per the instructions. Next make round balls each of around 1.5 inch diameter of the dough and press to flatten them between your palms. Place a ball on the rear side of the tawa and close the upper plate and lock the lever. Open it immediately and you’ll see a round roti inside. Flip it after 20 seconds. When air bubbles start showing on the roti’s surface, place the upper plate on it gently for a few seconds and the roti will be puffed up.
Check if this process is perfect. This is because you are buying the appliance for making rotis and not because the appliance is good to look at, shiny, easy to clean and store, etc. If it’s not making rotis as you want, everything else is useless. So, checking performance is the key.
Hopefully, your new roti-maker will make your life easy and delicious.

Make the Amazing Takoyaki and Enjoy the Taste and Praises
Do you know about takoyaki? Well, if you are a foodie, you should taste this awesome Japanese snack which are ball-shaped with an octopus in the middle.
But if you think that it’s hard to make takoyaki, you are wrong. With this excellent Takoyaki Maker, you can just easily make them at home.
What is Takoyaki?
Takoyaki is a ball of a diameter of 3 to 5 inch of fried dough with an octopus at its centre and condiments sprinkled on top. It’s said that this dish originates from Osaka.
Takoyaki is a famous dish available in almost every restaurant and stall in Osaka. And when there is a festival in Japan, takoyaki stalls can be seen everywhere.
How to Make Takoyaki?
Takoyaki is made in various forms and the ingredients used vary a lot too. However, as long as there is an octopus in it, it is considered to be a takoyaki.
Ingredients
For Batter:
- 200gm soft wheat flour
- 20ml milk (adding milk to takoyaki creates a mellow taste)
- 3 eggs
- Around 160gm octopus
For Condiments:
- Dried seaweed
- 30gm tenkasu (pieces of deep-fried dough)
- 2 sticks of green onion finely chopped
- Takoyaki (or regular) sauce
- Shoga (pickled red ginger)
- Katsuobushi (sliced dried bonito)
- Salad oil
- Mayonnaise
Method
Add the soft wheat flour, milk, water and eggs to a bowl. Mix together until no clumps of the flour remain. Brush every section of the takoyaki maker plate with oil. Add batter to each section till half. Add an octopus to each one. Next add tenkasu and then shoga. Now add chopped green onions.
Feel free to add as much or as little as all the ingredients as per your liking. Now add some more batter till it overflows each section a little. Switch the takoyaki maker on.
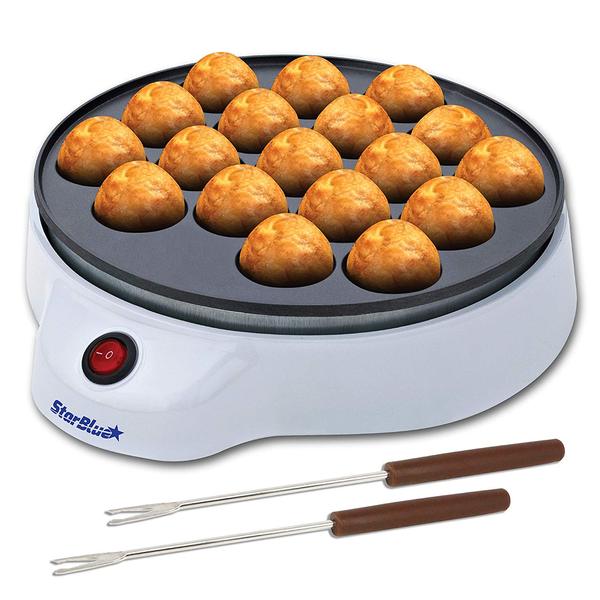
After a minute, take off the excess batter. Once you clean the plate, turn the balls over with takoyaki picks.
The key here is to fry them at 90-degree intervals. After they are cooked, start turning them and let them cook from all sides.
When their surface becomes light golden, they are done.
Add sauce and sprinkle as much dried seaweed, mayonnaise and katsuobushi as you like. You can even add cheese as it makes it taste amazing.
Bingo, your yummy takoyaki are ready! Serve, eat, and enjoy the taste and the praises from people!

4 Delicious Churro Recipes You’ll Love
If you don’t know about churros so far, you’re certainly missing something significant in your foodie life. This is an originally Spanish sweet snack, typically fried-dough pastries, but in the form of sticks and deliciously crunchy, and sprinkled with cinnamon and sugar to make them just addictive. Here’s a traditional churros recipe and some scrumptious churro-inspired recipes, you must try.
1. Churros Recipe
Ingredients
- 1 cup all-purpose flour
- 1 cup water
- 2 quarts oil for frying
- ½ cup white sugar or to taste
- 2 ½ tablespoons white sugar
- ½ teaspoon salt
- 1 teaspoon ground cinnamon
- 2 tablespoons vegetable oil
Method
Mix water, 2 ½ tablespoons sugar, 2 tablespoons of vegetable oil and salt in a small saucepan over medium flame. When it comes to a boil, remove from flame and stir in flour till a ball is formed of the mixture.
Take a deep skillet or deep-fryer and heat oil for frying. Let the temperature be 190 degrees C (375 degrees F).
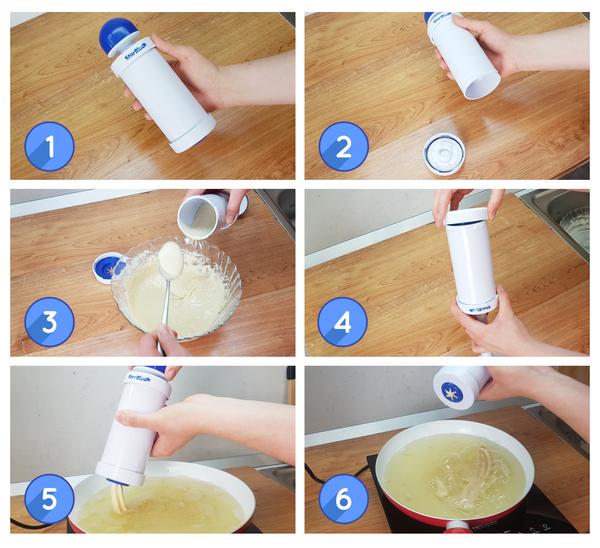
Put strips of dough into the hot oil using a churro maker. Fry till golden. Drain on a tissue.
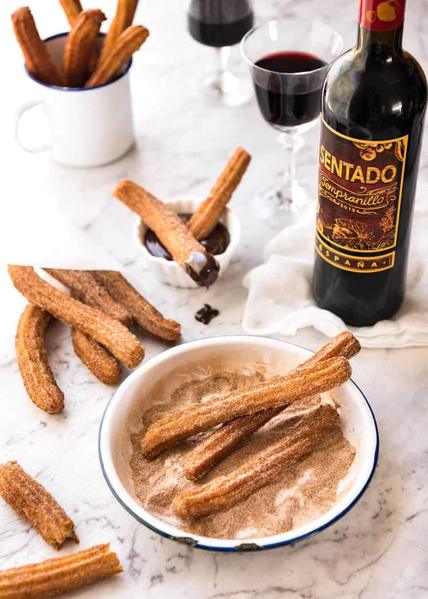
Mix ½ cup of sugar and cinnamon and roll the drained churros in the mixture.
NOTE: Use Churrera churro maker to make churros. Churrera is a tool that makes forming churros easier and quicker and can make a variety of churros with its 8 assorted discs. What’s more, you also get a free e-book with recipes of simple churros, Spanish churros and Mexican churros and various types of chocolate sauces too.
Recipes of Churro-inspired Goodies
2. Coconut Churros
Add a dash of yummy coconut to your regular churros with this recipe and enjoy with chocolate sauce or any other dip you love.
Take a heavy, high-sided pot and heat oil in it on medium flame till 360 degrees F. Make a mixture of cinnamon and sugar in a plate and set aside.
Mix 2 tablespoons of coconut extract, 1 cup water, ½ cup butter and ¼ tsp. salt in a medium sauce pan and bring to a boil over high flame. Stir in flour with a wooden spoon; reduce the heat and stir forcefully till a ball is formed. Remove from flame while stirring continuously and beat 3 eggs into it.
Make churros with the Churrera churro maker and fry them till golden brown. Cool them and roll in cinnamon-sugar mixture and enjoy with your favorite dip.

3. Churro Milkshake with Dulce De Leche
For this delicious churro delight, you’ll need 2-4 homemade churros plus more for dipping so you can just make an entire batch with Churrera churro maker.
Mix together sugar and cinnamon in a small bowl. Take 2 large or 4 small glasses and rub their rims with a bit of water (or coconut rum or tequila). Dip the rims in the sugar-cinnamon mixture and place the glasses in the freezer.
Add 2 churros to a blender (you can add more if you want it to make intense) along with milk, ice cream,, coconut rum or tequila, vanilla extract and 2 tbsp. of warm dulce de leche and blend till the consistency you want. Blend to completely smooth if you don’t want chunks of churros.
Take the glasses out from freezer and drizzle with warm dulce de leche from the inner sides and bottoms. Pour in the milkshake and garnish with one or two churros.
4. Churro Muddy Buddies
Mix white granulated sugar, brown sugar, powdered sugar and cinnamon in a small bowl and set aside.
Melt together 4 tablespoons of butter and chocolate chips in another small bowl by heating in microwave by stirring in between at the interval of 30 seconds.
Set aside cereal in a large bowl. Then pour chocolate over it and stir till cereal is fully coated. Then pour sugar mixture on top and mix till it coats the chocolate-covered cereal. Next, add a teaspoon of cinnamon and stir together. You can serve it immediately or store in a ziplock bag for later. But storing it in fridge and enjoy the cool muddy buddies is something you’ll love more.

Top Tips for Choosing a Perfect Cheese Cutting Board
You always wish that you should be able to cut cheese in exactly equal shape and size, so that it will look nice to decorate the dish. But cheese is a tricky food item which is slippery and crusty, and doesn’t cut always in equal shape. What you need here is a proper cheese cutting board. These are available in a variety of types and here are some useful tips to choose the right one among them.
Materials of Cheese Cutting Boards
Cheese cutting boards are made of various materials like wood, plastic, glass and ceramic. Choosing among these is a lot about personal preference. Some home chefs are happy with wooden boards because they are hygienic and less noisy, while some others prefer plastic or glass boards because they are easy to clean. So, which material is indeed ideal for a cheese cutting board?
What to Consider while Choosing a Cheese Cutting Board?
If you feel daunted while choosing among various cutting boards, you should ask certain questions to yourself and make a choice based on their answers:
- What will you use the cutting board mainly for? Will you use it only for cutting cheese or also for fruits, vegetables and even meat? Or will you use it to cut something dry like bread for making sandwiches?
- Will the cutting board get grooved or scratched so as to create areas for bacteria to develop?
- Will it remain stained with foods like beets?
- Will it retain smells (with onion or garlic, for example)?
Getting answers to these questions will remove much of confusion from your mind about choosing a cutting board. You can also consider pros and cons of individual materials.
Wooden Cutting Boards
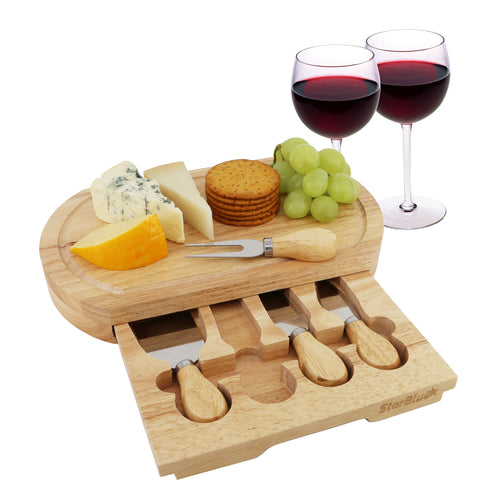
Although it seems to be unsanitary, wood has gained official approval by food safety organizations. It’s true that just like plastic, wood can get scratched with the cutting action of knives and bacteria can develop in the scratches. However, wood has been proven to be more sanitary than plastic because bacteria cannot easily develop into the wooden board’s grooves as previously assumed because they die over time instead of multiplying due to the natural antibacterial properties of wood. And now you can get the very convenient wooden cheese board set too with various types of knives with handy storage compartments.

Glass Cutting Boards
Glass is obviously a material that is unsurpassed when it comes to hygiene. Plus it gets no scratches. But the drawback of glass cutting board is that even sharp quality knives become dull on them soon and have to be sharpened again and again.
Plastic Cutting Boards
For a long time, it was believed that plastic is cleaner than wood; but this has been proven wrong. Plastic boards too get scratched and bacteria can develop and thrive in the scratches. The only way to clean a plastic board is to throw it in the dishwasher as it is impossible to clean it completely with hands.
So, consider these things while choosing your cheese cutting board and have the most perfect for you.

Make Hong Kong Style Egg Waffles at Home with the New Waffle Maker
Egg-shaped waffles are one of the most popular and delicious street foods in Hong Kong. They look like golden honeycombs and have a rich flavor of cake. Actually they are hollow and you can enjoy them with your favorite topping; but you can also eat them as they are because they have a distinct flavorful texture with a crisp shell outside and softness inside.
As per the available information, these delicious waffles were created first in the 1950s just by accident by an owner of an Asian grocery shop who was trying to make use of broken eggs to make egg batter. The eggs were added with flour, sugar and boiled milk, and were cooked after pouring the batter on a honey-comb shaped metal plate. Traditionally these tasty waffles are made using charcoal as a fuel; but in modern days, electric stove top is used for safety and hygiene, and also for cost-effectiveness.
Variations
The formula of the original Hong Kong style egg waffle has now been much changed and added with a variety of flavors like strawberry, chocolate, black sesame, shredded coconut and more. However, the original flavor remains unmatched. Those who belong originally to Hong Kong but now are away, miss this superb dish. But now they can make their favorite dish with a fantastic Bubble Egg Waffle Maker Machine!
Here’s the recipe!
Ingredients:
- 140gm plain flour
- 2 eggs
- 28gm boiled milk
- 140gm white sugar
- 1 tbsp custard powder
- 7.5gm baking powder
- 28gm vegetable oil to add to the egg batter
- 140 ml water
- 2 drops of vanilla essence
- 28gm tapioca starch
- A little vegetable oil to grease the mould (not needed if you use the above-mentioned Bubble Egg Waffle Maker Machine)
Method
Mix plain flour, custard powder, baking powder and tapioca starch together and sieve the mixture to remove lumps if any.
Add eggs to white sugar. Stir with a wooden stirrer. To this mixture, add boiled milk and water slowly. Mix well.
Now add the previously prepared flour mixture to the egg + sugar + water mixture and mix well with the stirrer to make a smooth batter. Remember that the batter should not have any lump. Add vanilla essence too and mix well.
Add vegetable oil as the last step and cover the pan of batter with a cling wrap. Keep the mixture in refrigerator for cooling down at least for an hour.
Take it out 30 minutes before using and let it come to room temperature.
In the meantime, warm up either side of the mould and apply a thin layer of oil on either side. If you use the above-mentioned Bubble Egg Waffle Maker Machine, you won’t have to apply oil because the waffle machine has a specially designed non-stick coating because of which the waffles will easily come off without leaving stains.
With the help of a ladle or cup, pour the batter from the pan over the mould up to 80%. Close the lid; hold tightly to ensure that it is tightly closed. Flip the mould to ensure that the batter is spread evenly inside the mould.
Place each side on medium flame for 1-2 minutes so that the waffles are cooked so as to be easily removed. With a fork, remove the cooked waffle on a plate and repeat with the next lots of batter till all the batter is finished.
Bring home the Hong Kong Egg Waffle Maker and live the nostalgia while enjoying the waffles!

I gifted the Cheese Board Set to my sister for her housewarming, and she hasn’t stopped using it. The oak wood feels premium, and the utensils cut cheese smoothly. Guests always compliment how elegant it looks.

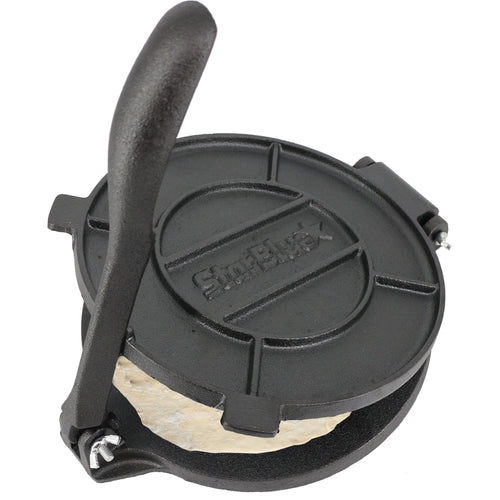
The Cast Iron Tortilla Press makes preparing tortillas effortless. Its heavy weight does all the work for me—no need to struggle with rolling pins. Every tortilla comes out perfectly round with minimal effort.

I bought the StarBlue Hamburger Grill Maker for weekend cookouts, and it’s now my go-to. Beyond burgers, we use it for eggs, bacon, toast, and even veggies—so versatile that breakfast is quicker and tastier than ever.

The Roti Maker has cut my cooking time in half. Instead of rolling and cooking one by one, I can prepare multiple in minutes. It’s a real time-saver, especially for busy family dinners.

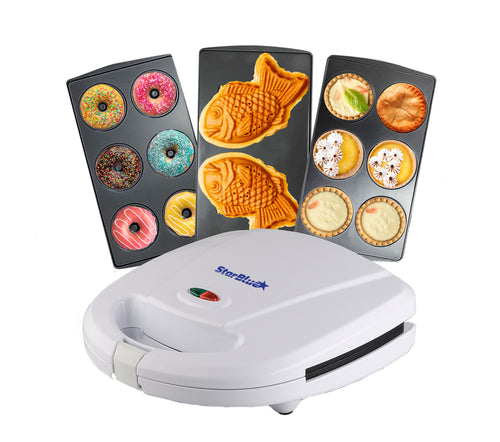
The Takoyaki Maker is amazing. I used to only enjoy takoyaki at restaurants, but now I can make 18 at a time at home. The included picks made flipping easy, and the flavor turned out authentic.

Your StarBlue Questions, Answered.
From cooking tips to product care, find quick solutions right here.
Money Back Gurantee and Replacement?
Our money-back guarantee is automatically extended to 4 months when buying on our Official website. Other official selling platforms (e.g. Amazon) have 2 months where possiblility to extended to 4 months by Registration.
Which countries does StarBlue deliver to, and how fast is the shipping?
StarBlue products are currently delivered within the United States only through our partnership with the Amazon Fulfillment Network. This ensures reliable delivery within 2–5 business days to all US addresses.
For customers outside the US, you can conveniently purchase StarBlue products through Amazon’s international stores:
🇨🇦 Amazon Canada
🇬🇧 Amazon UK
🇩🇪 Amazon Germany
🇫🇷 Amazon France
🇮🇹 Amazon Italy
🇪🇸 Amazon Spain
🇦🇺 Amazon Australia
Where to find the recipe Ebook?
Electronic Book is available by scanning QR code on box or user manual of your item.
If you cannot find it, simple submit the request here or email us cs@starblue.co
What if the item is damaged due to delivery?
We're always here to help! Feel free to contact us by here or email us at cs@starblue.co anytime.
How to make perfect rotis using StarBlue Roti Maker?
We made an easy video for an easy follow through steps.